Table of Contents
Adding Downtime
To add downtime to a run in LiveTracking, follow these steps.
- Navigate to the Run Report of the run where you would like to add downtime.
- Click on the Downtime tab.
- Click on the red circle with a + in the middle.
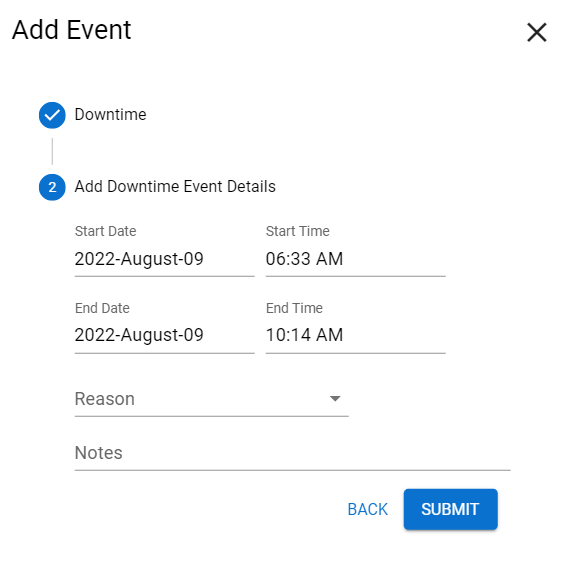
- From the dropdown menu, select the event type Downtime, then press Next.
- Fill out the details of the new downtime: Start/End Date and Time, Reason, and Notes.
- Click Submit.
Note: If you are unable to find a downtime reason that fits the situation, you can add a new reason. Here's a link to our article on Adding Downtime Reasons.
Deleting Downtime
To delete downtime in LiveTracking, follow these steps:
- Navigate to the Run Report of the run where you would like to delete downtime.
- Click on the Downtime tab.
- Find the Downtime you want to delete, and select Delete.
- A confirmation popup will appear, check the box, then Delete.
Warning: Deleting a downtime removes the data associated with it. There is no undo button.
Editing Downtime
To edit downtime in LiveTracking, follow these steps:
- Navigate to the Run Report of the run where you would like to edit downtime.
- Click on the Downtime tab.
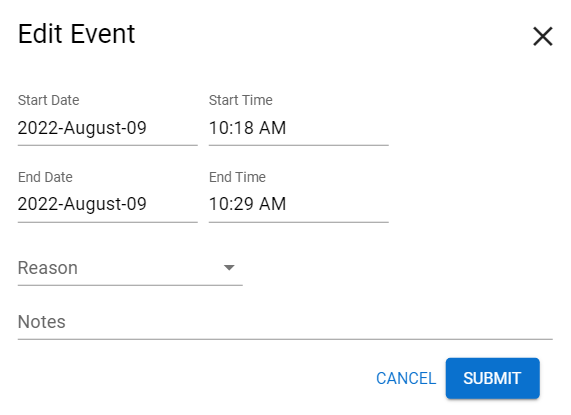
- Find the Downtime you want to update, and select Edit.
- Change the downtime details: Start/End Date and Time, Reason, and Notes.
- Click Submit.
Note: If you are unable to find a downtime reason that fits the situation, you can add a new reason. Here's a link to our article on Adding Downtime Reasons.