Table of Contents
Adding a Downtime Reason
To add a new Downtime reason to LiveTracking, follow these steps.
- Navigate to Reason Settings by clicking on Settings and selecting Reasons.
- Click the red circle with the + to add a Downtime reason.
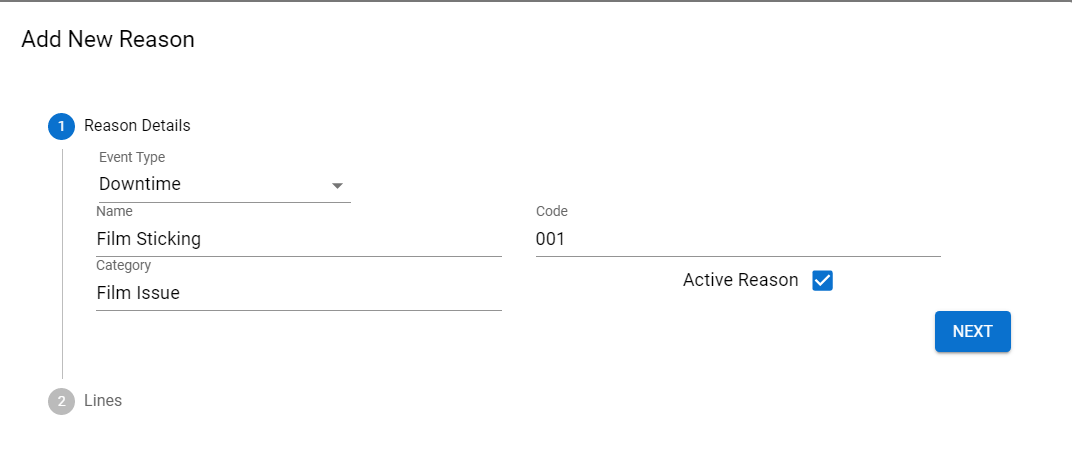 Fill out the details of your new reason including Event Type, Name, Category, and Code. Don't forget to activate your reason by ensuring the Active Reason box is checked.
- Press Next.
- Select the Lines that you want this new reason to appear on, then hit Submit.
Deactivating a Downtime Reason
If you no longer want to use a Downtime reason, it can be deactivated by following these steps.
- Navigate to Products Settings by clicking on Settings and selecting Reasons.
- Click on the Downtime tab.
- Find the reason you want to deactivate and select Details.
- Uncheck the box marked Active Reason.
Note: If you want to deactivate a reason only on a specific line, simply uncheck the line from the list of associated lines.
Video Example